Showing posts with label oven-free. Show all posts

Monday, July 30, 2018

Quick Pickled Red Onion


Pickled red onions are great when you have a dish that just needs a little extra oomph. They add brightness, bite, and crunch without the full-blown punch of straight up raw onion. Better yet, they require very little planning ahead. In the course of making a meal, you can start your prep by throwing together some pickled red onion, continue to the rest of the meal prep, and add your newly pickled red onion to your finished dish 30 minutes later.

The recipe below is very basic to keep the flavor profile more versatile. If you wanted to play around, you could add some whole peppercorns, garlic clove(s), fresh herbs, or the like.


Quick Pickled Red Onion
Yield: about 1 cup (the photos above show a single batch in a pint sized mason jar)

Ingredients
1/2 cup red wine vinegar
1 tsp. kosher salt
1 tsp. sugar
1 small red onion or 1/2 a medium one, sliced vertically 
Splash of water, if needed

Directions
Add vinegar, salt, and sugar to a jar or other microwave safe glass dish. Warm it in the microwave for just a bit (30-60 seconds ought to do it) to help the sugar and salt dissolve. Stir. Add your red onion slices and press down into the liquid. If needed, add a splash of water and/or a bit more vinegar so the onion is mostly covered. Let sit for at least 30 minutes before eating. I find it helps to put the lid on the jar and turn the jar a couple times during those 30 minutes.

Store in the fridge. I like to eat mine within 2 weeks or so, but I've seen nearly identical recipes that say they'll last for over a month. 

Tip
To vertically slice an onion, you basically are slicing from pole to pole instead of around the hemisphere. Slice off the root end and stem end (the poles), then cut the onion in half from pole to pole. With an onion half flat side down on the cutting board, make thin slices, again from pole to pole. Here's a video from Cooking Light.

Friday, June 8, 2018

Quinoa Salad with Cherries and Goat Cheese


Quinoa Salad with Cherries and Goat Cheese
Adapted from A Couple Cooks
Yield: 3 servings as a main dish, or 4-6 as a side

Ingredients
1 cup dry quinoa
5 oz. dried cherries
6 Tbsp. extra-virgin olive oil
2 Tbsp. maple syrup
2 Tbsp. dijon or whole grain mustard
1 Tbsp. white wine vinegar
2 granny smith apples, chopped into small pieces
1-2 handfuls fresh parsley, finely chopped
4 oz. goat cheese (or feta)
2-3 handfuls of baby arugula (I used a mix of baby spinach and baby arugula)
Kosher salt and fresh cracked pepper, to taste

Directions
Cook quinoa according to package directions, but use only 1-1/2 cups of water and add a pinch of salt. When the quinoa is cooked, stir in the cherries and let them hang out for a bit to absorb some moisture from the quinoa.

Make the dressing: Measure olive oil, maple syrup, mustard, and vinegar into a pint-sized or larger mason jar. Give it a good shake. (Pro tip: if you measure the oil first, then use the same measuring spoon for the syrup, the syrup will slide right out.)

Assemble the salad: Transfer quinoa and cherries to a good-sized serving bowl. Add the apples, parsley, and goat cheese and toss well. Add the dressing and several cracks of black pepper; toss. Add arugula and toss some more. Taste, and add more salt or pepper if needed. Serve chilled or at room temperature.

Notes
  • The original recipe also called for 1 shallot, thinly sliced and tossed in raw with the apples et al. Though I'm a fan of shallots, I left it out for the sake of my friend who can't eat them, and honestly didn't miss it.
  • While I don't think this salad was lacking, I do think some chopped pecans or almonds would be a lovely addition.

Sunday, April 8, 2018

Nigerian Fried Rice and West African Peanut Chicken


When my brother Josh comes to visit, text conversations like this one ensue.
Me: How would you feel about us making Nigerian food some time this weekend? I'm thinking curry fried rice and peanut chicken kebabs. 
Josh: Big fat yes on that.
And so we did. Since there are two recipes in this post, I'll keep my comments brief with these few observations:
  • I can't recall ever having curried fried rice. Or fried rice without soy sauce. I've been missing out.
  • In this global eating adventure, the dishes I've made from African countries have consistently been among my favorites. See my posts on Madagascar and Tunisia.
  • My house smelled incredible for hours after preparing this meal. We made it for a late lunch, and when we got back from house church at something like 9:00, a pungently spiced aroma greeted us when we came through the front door.
  • Honestly, I can't recall the last time I bought bouillon cubes, since I normally use Penzeys's soup base. But the writer of these recipes urged me to trust Nigeria, so I did. And Nigeria did not let me down.
  • If cooking both dishes as a meal, I recommend this sequence of prepping/cooking: 1) Cook the rice; prep the peanut mixture and rub it on the chicken. 2) Play a game of Pandemic while the rice cools and the chicken gets acquainted with its coating. 3) Prep the fried rice ingredients, fry the rice, and cook the chicken. If you're using a grill, then somewhere in there you'd need to prep your grill. 


Nigerian Curry Fried Rice
Adapted slightly from Global Table Adventure
Yield: 4 servings

Ingredients
1-1/2 cups long-grain white rice (uncooked)
2-3 Tbsp. oil (I used canola, and used more than 3 Tbsp.)
1 medium to large onion (yellow or white), small dice
2 cloves garlic, minced
1 Tbsp. curry powder
2 cubes chicken bouillon, crushed
1 bell pepper (yellow, orange, or red), small dice
8 oz. fresh green beans, small dice
1/2 cup corn kernels (canned, fresh, or frozen)
Salt, to taste

Directions
Measure rice into a fine mesh strainer and rinse well under cold water. Then cook according to package directions. Ideally, do this at least an hour ahead of time and, when the rice is finished cooking, remove the lid and fluff with a fork, then let it sit for a while to cool off and dry out a bit. If you made the rice the day before, all the better.

Now prep all your ingredients. We used corn kernels as a basic size guide for everything we chopped. I like to organize ingredients as I prep them. So the onions went on their own plate; the garlic, curry powder, and chicken bouillon went into a little condiment cup together; and the bell pepper, green beans, and corn shared another plate.

Heat 1 Tbsp. or so of oil in a large skillet or wok over medium-high heat.* Add the onion, and saute until softened and translucent. Add the garlic, curry powder, and bouillon and stir for just 30 seconds to a minute, then add the bell pepper, green beans, and corn. Continue cooking and stirring for a few minutes more, until the veggies are starting to soften, adding more oil as needed. Finally, incorporate the cooked rice, and keep on stir-frying until the rice is hot and a little browned, again adding more oil as needed. Taste and add salt if needed. Enjoy!

Note
*We used my 12-inch cast iron skillet, which I anticipated would not be big enough for the whole recipe. So we went with half the onions, half the seasonings, half the veggies, and half the rice, removed that to a serving bowl, then repeated the process with the other half of everything. And we started heating the chicken skillet about the time that the first half of the fried rice was done. 


West African Peanut Kebabs (Suya)
Yield: 4-6 servings

Ingredients
1-1/2 lbs. chicken or beef, sliced into strips*
1 cup roasted peanuts
1 Tbsp. grated fresh ginger
3 cloves garlic, minced
1 chicken bouillon cube, crumbled
2 tsp. paprika
1-1/2 tsp. onion powder
Cayenne pepper, to taste
Salt, to taste

Directions
Toast your peanuts in a dry skillet over low heat, just until they start to toast and smell amazing. Remove from heat (and from the hot skillet) and allow them to cool while you prep other ingredients. (You could skip this step. It was my addition because I love the extra flavor hit you get when toasting nuts.)

Blitz the peanuts in a food processor until they're crumbled/finely chopped, but be careful lest you end up with peanut butter. The ol' Magic Bullet did okay with this task, but not great. Combine the peanuts with the ginger, garlic, bouillon, paprika, onion powder, cayenne, and salt.

If you're feeling authentic, thread your strips of meat onto skewers, then press the peanut mixture onto the meat. If you're feeling lazy, dump the meat into a gallon zip bag along with the peanut mixture, and give it a nice massage so the meat is coated nicely. Either way, refrigerate the seasoned meat for at least 30 minutes.

Cook over medium heat--in a skillet or on a grill--until done, being careful not to move them around too much, as the coating will fall off pretty easily.

Note
*We used boneless, skinless chicken thighs; apparently you could also use ram.

Wednesday, August 2, 2017

Ethiopian Cucumber-Mango Salad


In my last post you may recall that I had a little soapbox moment about lumping all African countries together instead of recognizing them as very distinct countries and cultures.

Well, apparently I have now accidentally lumped two African countries and cuisines into a single menu, despite my best intentions. As it turns out, the ambiguous "East African" salad that wouldn't commit to a specific country but inspired me to cook up some Malagasy food, is actually Ethiopian. While typing up the recipe, I did a quick search to see if Cooking Light had an online version of the Cucumber-Mango Salad recipe. They do. And the online version very clearly identifies it as Ethiopian. So there you go.

Ethiopia and Madagascar, I acknowledge your distinctness, honor you as two different countries, and appreciate your foods.

Ethiopia's Cucumber-Mango Salad was a win. The longer ingredient list made for all sorts of flavors and textures pinging around in my mouth. The cinnamon, cumin, and clove hint at Indian curry flavors, while the tomato, mango, and cilantro are reminiscent of Latin salsa. The cucumber and red onion add crunch, and the lime juice wakes everything up and ties it all together. Mine turned out a little mushier than the cookbook photo suggested, but the taste was stellar. If you're mush-averse, I'd suggest using firm tomatoes or leaving them raw.


Ethiopian Cucumber-Mango Salad
From Cooking Light's Global Kitchen cookbook
Yield: 6 servings

Ingredients
1 cucumber, thinly sliced (about 2 cups)
1-1/2 cups finely chopped red onion
1/2 tsp. salt

A drizzle of peanut oil (I used canola)
1 lb. tomato, chopped and seeded (ideally drained, too)
3 Tbsp. chopped peanuts (dry-roasted, preferably unsalted)
1-2 jalapenos, seeded and finely chopped*
1/4 tsp. ground coriander
1/4 tsp. ground cumin
Pinch of cayenne
Dash of ground cinnamon
Dash of ground cloves

1 garlic clove, minced
1-2 mangoes, peeled and diced (about 1-3/4 cups)
1 Tbsp. chopped fresh cilantro
1 lime, juiced

Directions
Toss the cucumber and red onion with the salt, and set in a colander to drain for at least 20 minutes.**

Heat a medium to large skillet over medium-high heat. Add the oil, followed by the tomatoespeanutsjalapenoscoriandercumincayennecinnamon, and cloves. Saute for just a few minutes, until the tomato is tender and warmed through (about 5 minutes tops). Remove from heat and allow to cool to room temperature.

In a medium to large bowl gently toss together the cucumber mixture, tomato mixture, garlicmangocilantro, and lime juice.

Notes
*If you can find red jalapenos, then do one red and one green. I used just one jalapeno, and the salad was very mild. Could have easily tossed in another and been totally fine.
**The recipe said to include the garlic at this stage, but I was afraid it would just fall through the holes in my colander. So I set it aside in a separate tiny dish with a sprinkle of salt.


Monday, July 31, 2017

Malagasy Chicken with Ginger (Akoho sy Sakamalao)


Note to self: onions that are simmered in a luscious amount of coconut oil until they're so soft they melt in your mouth ... are not photogenic. More important note to self: they're terrific for eating.

While flipping through reading like a novel the Global Kitchen cookbook, an East African Cucumber-Mango Salad recipe caught my eye but also presented a dilemma. You see, it reeeeally bothers me when people treat the entire African continent as a single country, culture, or people group. It's just wrong. So I was miffed that the recipe was associated with the broader region of East Africa rather than a specific country ... to the point that I almost wrote off the recipe on principle. But it sounded so yummy and summery! So I struck a compromise with myself: I'd find a main dish recipe from a specific country in East Africa, and make this ambiguous Cucumber-Mango Salad as a side dish.

The winner of that internet search was Akoho sy Sakamalao--literally "chicken and ginger"--a dish hailing from Madagascar. To be honest, the recipe sounded good but not amazing. The ingredient list is simple, the cooking technique un-fussy. But my first bite revealed the dish to be far greater than the sum of its parts. There's some kind of magic happening with the ginger-lemon-garlic rub, the caramelizing onions and bell peppers, the nutty coconut oil, and the bed of simple rice soaking up all those flavors.

All in all, a wonderful meal! The Akoho sy Sakamalao recipe is below, and the Cucumber-Mango Salad recipe is here. Thanks, Madagascar!


Malagasy Chicken with Ginger (Akoho sy Sakamalao)
Adapted from Global Table Adventure
Yield: 4 servings

Ingredients
3 cloves garlic, minced
1-inch piece of fresh ginger, grated
Zest from 1 lemon
4 chicken thighs (I used boneless, skinless, without the drumsticks attached)*
1/3 cup coconut oil**
1 orange bell pepper, sliced
1 onion, sliced
Salt and pepper, to taste
Cooked white rice, for serving

Directions
Combine the garlic, ginger, and lemon zest, and rub it all over the chicken. Cover (or put into a plastic zip bag) and refrigerate for at least 2 hours. Overnight or all day would be perfectly fine.

In a large skillet, heat the coconut oil over medium heat. Brown the chicken until it's a lovely golden color on both sides. When you add the chicken to the pan, your oil will probably go crazy. I recommend putting a lid on the skillet, but tilt it to let steam out, and pull the skillet off the burner to let the oil calm down a bit any time you need to mess with the food inside.

When the chicken is beautiful, take it out of the pan, and season it with salt and pepper. Add the bell pepper and onion to the pan, and saute until softened. Add the chicken back to the pan, lower the heat, and put a lid on (not tilted this time). Let it simmer for about 45 minutes, until the chicken is super tender. I gave the skillet a good shake/slide/jiggle every so often to keep things from sticking.

Cook your rice while the chicken and veggies are simmering.

Nibble a bit and add more salt and pepper if needed. To serve, spoon a good portion of rice onto your plate. Top with onion/bell pepper mixture and a chicken thigh. Scoop some of the sauce over the whole thing--the sugar from the onions and lemon will have caramelized nicely, and all that glorious flavor will be packed into your coconut oil sauce.

Notes
*The recipe on Global Table Adventure uses bone-in thigh quarters (leg and thigh both). I decided to go for just thighs in order to have smaller portions and less meat, and at the store I went into auto-pilot and got boneless skinless, though bone-in probably would have been more flavorful.

**I couldn't quite bring myself to eat an entire 1/3 cup of coconut oil by myself, so I ended up scooping it only sparingly over my plate ... which meant that a lot of that glorious caramelized flavor was wasted. If I make this again, I'd probably scale back to 3-4 Tbsp. coconut oil instead of a full 1/3 cup.


Sunday, May 14, 2017

Vietnamese Shrimp Noodle Bowl (Bun Tom Xao)


The first time I remember having Vietnamese food, it was at a pho restaurant in Los Angeles. My family got pho on my brother's recommendation, but I ended up ordering some other dish. Though I don't recall the name of the dish, I remember that it smelled gross but tasted pretty good. The gross-but-good culprit? Fish sauce. It truly does smell terrible. But when you mix it with something sweet, something acidic, and something spicy, it somehow transforms into this tasty thing that leaves you wanting more.

This dish comes from the Global Kitchen cookbook. And I'm happy to report that I could find all the ingredients locally. I've found fish sauce, rice vermicelli, and serrano peppers at both HEB and the north Walmart. If you don't see rice vinegar with other vinegars, look in the international and/or Asian section of your grocery store.


Bun Tom Xao (Vietnamese Shrimp Noodle Bowl)
Slightly adapted from Cooking Light, as seen in Global Kitchen cookbook
Yield: 4 servings

Ingredients
1/2 cup warm water
3 Tbsp. granulated sugar
1/4 cup fresh lime juice (about 2 limes)
1 Tbsp. rice vinegar
5 tsp. fish sauce
1-2 serrano chiles, thinly sliced

3 cups sliced cucumber (about 1 large cucumber)
4 cups green leaf lettuce, chopped
1/4 cup fresh cilantro leaves
1/4 cup torn fresh mint leaves
1/4 cup torn fresh basil or Thai basil leaves

5 oz. rice vermicelli noodles
1/2 cup peanuts, coarsely chopped (toasted if desired)
1/3 cup sliced green onions (1/4" slices) (about 2 green onions)
3 garlic cloves, finely chopped

2 tsp. cornstarch
1 tsp. dark brown sugar (I used light brown)
1/4 tsp. kosher salt
3/4 tsp. black pepper (or white pepper if you have it)
1 lb. shrimp, peeled, deveined, and tails removed (thawed if frozen)
Canola oil

Directions
In a two-cup measuring cup or small bowl, combine warm water and sugar, stirring until sugar dissolves. Add lime juice, rice vinegar, fish sauce, and serranos. It's going to smell seriously funky, so cover it with plastic wrap to keep that funk at bay, and set aside while you prepare the rest of the meal.

Peel cucumber if it's bitter. Cut into quarters lengthwise, then slice thinly. Toss with the lettuce, cilantro, mint, and basil.

Cook the rice vermicelli according to package directions. Rinse very well in cold water, and set aside to drain well. These noodles are super starchy, so if they're sitting for very long, give them another good rinse if they start to get sticky.

While the noodles are cooking, toast your peanuts, if desired, and allow them to cool before chopping. Slice your green onions and chop your garlic.

Combine cornstarch, brown sugar, salt, and pepper in a bowl. Add the shrimp and toss to coat well. If you have a wok, now is its time to shine. Otherwise, a large skillet will do quite nicely. Heat your wok/skillet over high heat, and add a swirl of canola oil. Add the shrimp to the pan, and cook until they start to develop a nice sear. When they're almost done, add the green onion and garlic, and stir-fry for about 30 seconds to 1 minute more. Remove from heat.

To serve, put a generous portion of the lettuce mixture in the bottom of each bowl. Top with noodles, shrimp, and chopped peanuts, and about 1/4 cup of the fish sauce-lime mixture.

Notes

  • I've also made this with boneless, skinless chicken thighs, chopped into small, thin slices about the size of medium shrimp. And I actually liked it better with the chicken. If you use chicken, prepare and cook it the same way; you'll just need to cook it a bit longer than the shrimp.
  • When I made this for just myself, I used only 1 serrano chile. When I made it with a friend I put 1 serrano in the sauce and sliced the other for an optional addition at table.


Sunday, April 23, 2017

Apricot Rose Tartines

One of the food delights I'm enjoying this year is a monthly gathering with a few foodie friends. Each month we pick a theme (like chocolate or pasta), and create a menu based on that theme. This month's theme was a spring-inspired high tea, with a menu infused with edible flowers and herbs. My contributions were these apricot rose tartines and some cucumber radish tartines.

I looked at a bunch of recipes, and drew inspiration especially from recipes in Wild Spice and Honey and Co., but ended up cobbling together something pretty distinct from anything I found online or in my slowly growing cookbook library. If I were a really legit food blogger, I'd make these tartines again to refine the ingredient quantities, instructions, and photography before blogging about them. But who has time for that? (And who can eat that much mascarpone without becoming ill or large?) So I've done my best to capture what I did, but these tartines were far from an exact science.


Apricot Rose Tartines
Yield: about 40 tartines
HercheyK original

Ingredients
2/3 cup granulated sugar
2/3 cup water
6 whole black peppercorns
1/2 of a cinnamon stick
Approximately 40 dried apricots
1 tsp. orange blossom water
8 oz. mascarpone cheese, softened
1/2 cup fresh rose petals, very finely chopped
1 Tbsp. dried lavender buds
Fresh lemon zest, from about 1/2 of a lemon
Fresh orange zest, from about 1/3 of a medium-small orange
1 (8.3-oz.) baguette, sliced into rounds
A couple handfuls shelled pistachios
Fresh mint

Directions
To a medium saucepan add sugar, water, peppercorns (keep them whole), and cinnamon stick. Bring to a boil, then reduce heat so it's somewhere between a rapid simmer and a slow boil. Let the mixture cook for 5-8 minutes, stirring occasionally, then remove from heat.

While the sugar mixture is cooking, cut up your apricots into fat matchsticks--about 4 sticks per apricot. When your apricots are cut and your sugar mixture is finished cooking, fish out the cinnamon stick and peppercorns. Add the orange blossom water and the cut apricots to the pot. Stir it so the apricots get nicely coated with the syrup. Breathe in the glorious fragrance. Put a lid on the pot and pop it into the fridge (on a potholder) to chill and steep.

To make the spread, combine the mascarponerose petalslavenderlemon zest, and orange zest in a bowl. Stir to combine well. Cover and refrigerate until ready to assemble the tartines.

Slice the baguette into rounds. I ended up with I think 43 slices not counting the ends, but it'll vary based on the exact length of your baguette and how thick your slices are.

Heat a dry skillet over medium-low heat and toast the pistachios for a few minutes, until they just start to toast. Be sure to shake or stir them frequently to keep them from burning. Remove them to a plate to cool. Chop them fairly finely.

Now's a great time to wash your fresh mint and set it out to air-dry. Right before assembling the tartines, chiffonade the fresh mint. Chiffonade is basically just a fancy way to say, slice it into really thin threads.

When the apricot mixture has chilled sufficiently, assemble your tartines. Spread each with a schmear of the mascarpone mixture. Arrange a few apricot pieces on top--about the equivalent of one apricot per tartine. Sprinkle pistachios over the top. Finally, top with a few ribbons of fresh mint.

Note: If you don't have orange blossom water, squeeze in some fresh orange juice or add some orange zest to the sugar-apricot mixture. It won't give you the same floral quality you'll get from orange blossom water, but it should still be quite yummy. However, I very much recommend getting some orange blossom water! It tastes truly magical, and you can get it on Amazon if you can't find it locally. For more orange blossom water uses, see my Orange Blossom Iced Tea post and the Tunisian Orange Almond Cake recipe linked in my Flavor Trip to Tunisia post.

Monday, February 13, 2017

Orange Blossom Iced Tea

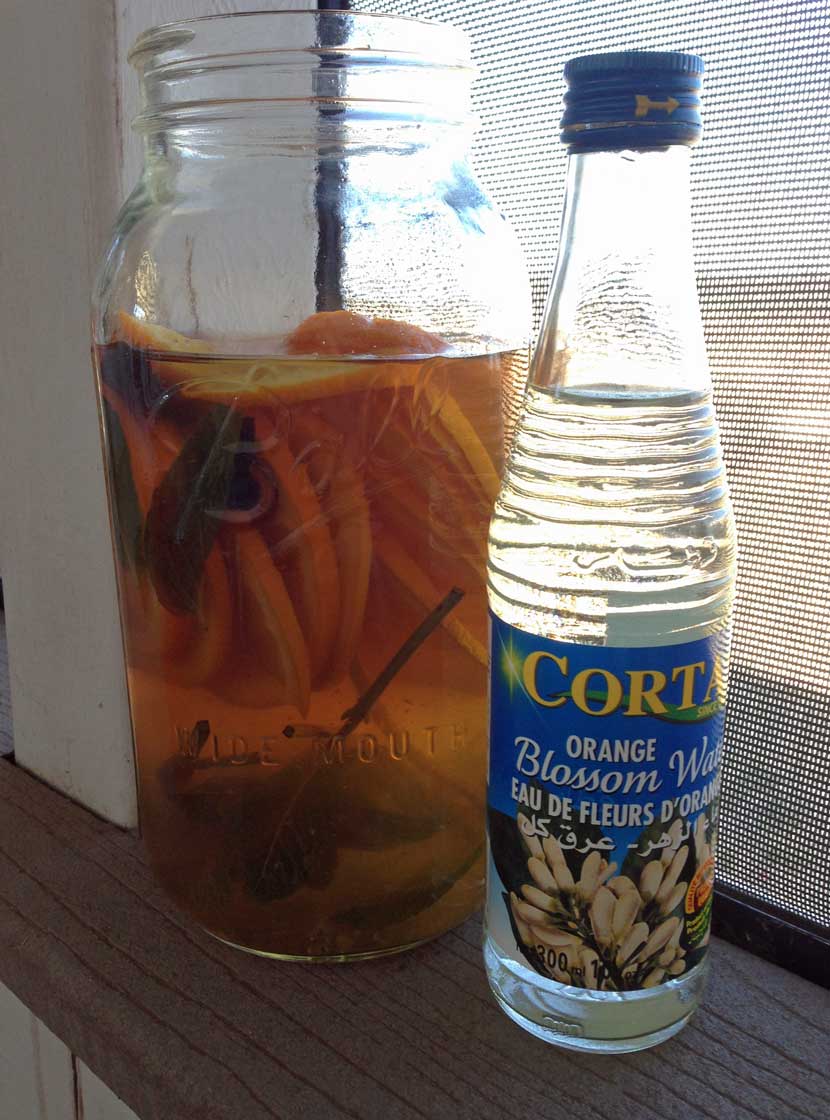
I'd like to introduce you to my new friend Orange Blossom Water. She's dainty yet mighty, mysterious and strong.

Throughout the Honey and Co. cookbook, I kept noticing recipes that called for orange blossom water, and I kept feeling disappointed because I doubted I'd be able to find it in any stores here. Happily, there's this thing called Amazon, and they sell basically everything, including orange blossom water.

This tea tastes like something Lady Galadriel would sip on a hot summer day.


Orange Blossom Iced Tea
From Honey and Co.: The Cookbook
Yield: 1/2 gallon

Ingredients
6 cups water
2 Earl Gray tea bags
1 cup sugar
1 cup water
1 Tbsp. honey
2-3 tsp. orange blossom water
1 orange, sliced
4 sprigs fresh mint
Additional mint and orange slices for garnish (optional)

Directions
Bring 6 cups water to a boil. Remove from heat, add tea bags, and steep for 15 minutes. This seemed like waaay too long, but I trusted the recipe, and it turned out beautifully.

While the tea steeps, make a simple syrup: Combine sugar, 1 cup water, and honey in a small saucepan. Bring to a boil, then reduce heat and simmer for a couple of minutes, until sugar and honey are fully dissolved. You will now have about 1-1/2 cups of simple syrup, and you'll need only 1 to 1-1/4 cups of it for this recipe.

When the tea is done steeping, discard the tea bags. Pour the tea into a heat-resistant jug or jar, such as a 1/2-gallon mason jar. Add 1 to 1-1/4 cups simple syrup (see notes), orange blossom water, orange slices, and mint sprigs. Cover and refrigerate until fully chilled.

Serve over ice, with additional mint and orange slices if desired.

Notes
  • I used 1-1/4 cup simple syrup, which is what the recipe called for. The resulting tea was very sweet, though not unpleasantly so, especially if you like sweet tea. Next time I'll probably scale back to just 1 cup of simple syrup.
  • If this tea sounds yummy but it's not feasible for you to get orange blossom water, don't let that stop you from making it! I imagine this would still be lovely and refreshing without the orange blossom water. Steeping some culinary lavender buds with the tea could be an interesting way to add a floral element.

Monday, June 20, 2016

Coleslaw for Haters


Not long after finishing second grade, I set out on a quest.

You see, my family moved from the land of green bean casserole and strawberry-rhubarb pie to the land of barbecue brisket. Which meant that now, any time we went to a catered meal of some sort, there was a really good possibility that it would feature barbeque meat(s) served with a handful of sides that always included coleslaw. You know the stuff. Kinda soggy chopped cabbage swimming in mayo-based soup that's occasionally too peppery and usually too sweet.

As you might have guessed, coleslaw and I did not become fast friends. But since we were so often in each other's company, it seemed only right to learn to at least tolerate each other. So I began my quest to develop a liking for coleslaw (and baked beans and potato salad, for that matter).

Through the years I've grown to like coleslaw okay, but usually only a few bites before the soggy, creamy sweetness is just too much.

Then one day I met mayo-free coleslaw.

She's happy and bright and tastes like summer. She's fresh, crunchy, and SO not fussy, and she’s got a bit of sassy tang. Mayo-less slaw has become my go-to sidekick when going to a cookout, especially if I’m short on time. I've brought her to a LOT of gatherings in the last few years, and nearly every time, someone says a variation of, "I don't like coleslaw, but this is really good."

I couldn't agree more.


Mayo-Free Coleslaw
Adapted from Marc Matsumoto
Yield: 6-8 servings

Ingredients
Zest of 1/2 lemon
1/4 cup lemon juice (I use the juice from the zested lemon, then supplement with bottled lemon juice)
1/4 cup olive oil
1 Tbsp. honey
1 tsp. kosher salt
1/4 tsp. black pepper
2 bags of coleslaw mix, about 14 oz. each*

Directions
In a jar, combine lemon zest, lemon juice, olive oil, honey, salt, and pepper.** Give it a good shake. Dump the coleslaw mix into a serving bowl and pour the dressing on top. Toss well. That’s it.

I prefer to serve mine within 30 minutes to an hour after dressing the slaw. If you like a softer, more pickled slaw, store it in the fridge for a few hours.

Notes 
* I usually use 1 bag regular mix (green cabbage, red cabbage, and carrots) and 1 bag broccoli slaw.
** Alternatively, you can add all the dressing ingredients to your large bowl, whisk well, and add the slaw mix on top. I like the jar method because I usually end up taking the slaw and dressing separately to wherever I’m going and dressing it as soon as I get there.

Variations
Marc Matsumoto sometimes uses vinegar or lime juice instead of lemon, or brings whole grain mustard into the mix. I imagine cilantro would be a delightful addition with lime juice and lime zest. For years now, I’ve had great intentions of trying one of these variations, but I like the original so well that I have never strayed! So if you try one of the variations, I’d love to hear how you like it!


Wednesday, August 26, 2015

Panna Cotta (and Pasta Night!)

Photo credit: Chai Green
A couple weeks ago, I had some friends over for a hands-on dinner party, and we tackled two of my 2015 food goals in one night: pasta and panna cotta. I made the pasta dough and panna cotta ahead of time, and once my friends arrived, I put them to work helping roll pasta.

For the pasta dough, I used the recipe from Cooking at Home with the Culinary Institute of America. Basically all you need is flour, a bit of salt, egg, and a bit of oil. For rolling and handling technique, I found this article from Serious Eats to be very helpful. It's also a good read if you like to get real nerdy about your food. We used the old-school hand crank pasta rollers and cutters, for which you really do need two people--one to turn the crank and hold the machine in place, and one to feed the dough through the rollers and catch it as it comes out. I don't understand how people manage a hand crank roller by themselves! Making fresh pasta was a lot of work, but it was fun work with friends who were willing to pitch in and work for their dinner. And it tasted so good!

It was Lynn Rosetto Kasper of The Splendid Table podcast who inspired me to make panna cotta, so I originally planned to use her recipe. However, she uses sour cream in hers, and I couldn't find lactose-free sour cream for my lactose-intolerant guest, so I used The Kitchn's recipe instead. It tasted delicious, looked and felt fancy, and was actually really easy to make. And you can easily vary it up with different toppings or even different kinds of milk or flavorings. I will definitely make panna cotta again. See tips and topping ideas in the notes below the recipe.

Also, for an appetizer that night, I made simple peach-basil crostini. Simply slice a baguette, spray or brush lightly with olive oil, and spread out on a baking sheet. Then broil for just a few minutes until toasted (watch closely!). Then chop up some fresh peaches, and toss it with some thinly sliced fresh basil. Scoop the peach-basil mixture onto the crostini, and you've got a tasty, summery bite. A bit of ricotta or creamy goat cheese probably would have been a nice addition. Bonus: the peach-basil mixture tasted sublime on the panna cotta.


Panna Cotta
Yield: 6 servings (6 oz. each)

Ingredients
1-1/2 cups whole milk
1 Tbsp. powdered gelatin
1/3 cup sugar
1-1/2 cups heavy cream
1 tsp. pure vanilla extract
Pinch of salt
Fresh raspberries, chopped fresh peaches, or other toppings of choice (see notes)

Directions
Pour the milk into a saucepan (off the stove) and sprinkle the gelatin evenly over the top. Let sit for 5 minutes. The surface will get wrinkly and the gelatin will be slightly dissolved.

Set the saucepan over low heat and warm the milk gently, whisking frequently. The milk should never boil, simmer, or even start steaming. If it starts to steam, remove it from the heat and let it cool slightly. The milk should get warm, but not so hot that you can't hold your finger in there for a few seconds. After about 2 minutes of warming, rub a bit of the milk between your fingers to make sure it's smooth and doesn't feel gritty at all.

Add the sugar to the milk, whisk it, and continue warming until the sugar is dissolved. Again, make sure the milk doesn't get too hot. This whole process of dissolving the gelatin and the sugar shouldn't take more than 5 minutes. 

Remove the saucepan from the heat. Whisk in the cream, vanilla extract, and a pinch of salt. Let the mixture sit out so it cools to room temperature. Whisk it again, then pour into wine glasses, ramekins, or other container of choice. Chill for 1-2 hours or more. The longer it chills, the firmer it will be. Add toppings of choice and serve.

Notes
  • Topping ideas: Fresh raspberries, blackberries, and strawberries (puree some for a sauce, if desired). Chopped fresh peaches, tossed with fresh basil, if desired. Drizzle of thick, good-quality balsamic vinegar. Drizzle of honey. 
  • The gelatin we're using here is plain, unflavored, unsweetened gelatin. In other words, not Jello. I found it in the Jello and pudding section of the grocery store, and the brand I got looks like this. It had 4 little envelopes of gelatin powder, and it took almost two envelopes to measure 1 Tbsp. 
  • When I got ready to pour the milk mixture into the wine glasses, I found it helpful to line a cookie sheet with non-slip shelf liner, then put the wine glasses on that. It made it easier to move them into the fridge all at once with no slip 'n' slide action.
  • The Kitchn has two panna cotta articles that I found helpful: How to Make Panna Cotta and Why Panna Cotta Is the Perfect Dessert. In both articles, she mentions that sometimes the milk and cream can separate into layers of lighter and heavier fat levels while the panna cotta chills. In the first article she recommends using half and half (instead of milk plus cream) to combat this, and in the second article she recommends allowing the mixture to come to room temp and whisking again before pouring into ramekins. I went with the latter solution, as you see in the recipe above.
  • If you want to unmold your panna cotta to serve it, see the instructions in the How to Make Panna Cotta article linked above.

Thursday, August 20, 2015

Lebanese Lemon-Parsley Bean Salad


Lebanese Lemon-Parsley Bean Salad

Adapted slightly from Cookie and Kate
Yield: 6 servings

Ingredients
2 (14-oz.) cans red kidney beans
1 (14-oz.) can chickpeas
1 small red onion, diced
2 stalks celery, diced
1 medium tomato, diced
1 medium cucumber, peeled, seeded, and diced
3/4 cup chopped fresh parsley
1-2 Tbsp. chopped fresh mint
1/4 cup olive oil
1/4 cup lemon juice (fresh or bottled)
2-3 cloves garlic, minced
3/4 tsp. salt
1 tsp. dried dill
Pinch red pepper flakes

Directions
Pour the kidney beans and chickpeas into a colander. Rinse well and allow to drain while you chop all the veggies.

In a good-sized bowl, combine the beans with the red onion, celery, tomato, cucumber, parsley, and mint. If prepping ahead, cover the bowl and refrigerate until ready to dress and serve the salad.

To make the dressing, combine the olive oil, lemon juice, garlic, salt, dill, and red pepper flakes in a pint mason jar (or larger). With the lid on, give it a good shake. If prepping ahead, leave the lid on and store the dressing in the fridge until ready to serve.

Pour the dressing over the bean mixture and toss gently but well. Serve immediately, or refrigerate up to an hour or two.

Monday, July 27, 2015

Grilled Cheese, Two Ways

Today, my friends, I bring you two ooey-gooey variations on grilled cheese. Behind Door #1 we have a Peach Grilled Cheese with Mozzarella and Brie. Initially I was planning to do a caprese grilled cheese, but the peach festival had me still in the mood for peaches, and peaches and basil go well together, so I swapped out the tomatoes for peaches. And then I threw some brie into the mix, because when is brie not a good idea? And the second time I made it, I added a drizzle of lavender balsamic vinegar.


But after making the Peach Grilled Cheese twice, I was out of peaches, so I went searching the internets for ideas to use up the rest of the brie, mozzarella, and sourdough bread. Which brings us to the sandwich behind Door #2—Avocado and Tomato Grilled Cheese with Mozzarella and Brie. I actually liked this one better! The original recipe called for sundried tomatoes, which would have been lovely on this sandwich . . . but the sundried tomatoes in my fridge tasted a little past their prime, and I had a perfectly good fresh tomato on my counter, so that’s what I went with.


Both of these grilled cheese combinations were cheese-drippin’-down-your-chin good! The avocado one especially was very rich, and the peach one offered a lovely sweet vs. creamy contrast, though I wish I’d used more peaches because their flavor almost got lost. Red onion would probably be a great addition to either or both of these sandwiches. And if prosciutto was more my thing, I think it’d be a perfect addition as well. 

Grilled Cheese, Two Ways
Yield: However many sandwiches you make
Avocado variation adapted from Serious Eats

Ingredients
Sourdough bread (or other bread of choice)
Olive oil spray
Fresh mozzarella
Brie
Fresh basil

Peach Variation
Fresh peach
Balsamic vinegar or lavender balsamic vinegar (optional)

Avocado Variation
Avocado 
Fresh tomato or sundried tomatoes
Salt and pepper

Directions
Lightly spray one side of each slice of bread (what will be the outside of the sandwich) with olive oil. On the inside of the sandwich, arrange slices of brie on one slice of bread and slices of mozzarella on the other side.

Slice your peaches or your avocado and tomato, and layer them on top of the mozzarella. If desired, grill the peaches to get a bit of caramelization (I did this but don’t think it was necessary). If using fresh tomatoes, seed them so your sandwich doesn’t get too watery. Add a drizzle of balsamic or a sprinkling of salt and pepper

Sprinkle thinly sliced basil over the top. Now, if you press the brie into the bread a bit, it’ll stay put while you flip that slice of bread over to place on top of the sandwich. 

Preheat a skillet over medium-low heat. Carefully slide the sandwich into the skillet, and cook for a few minutes on each side, until the bread is nicely toasted and the cheeses are gooey. I usually cover it for half the cooking time to help the sandwich get warm throughout. Move the sandwich to a cutting board and carefully slice in half before serving.

Notes
  • It would have felt weird to put measurements in a grilled cheese recipe, but just to give you an idea of some of the quantities: For each sandwich, I used less than half of a medium peach, just under half a regular (not hass) avocado, and about a third of a roma tomato. My bread slices were bigger than a slice of standard sandwich bread. 
  • For the cheeses, I bought a pretty small wedge of brie and a fist-sized ball of mozzarella (sorry I threw away the wrappers and transferred them to zip bags before thinking to write down how many ounces I bought of each cheese!). I've made three sandwiches and have enough brie for one more, and would have enough mozzarella for probably two more sandwiches if I hadn't nibbled so much of it. 

Monday, July 13, 2015

Peach Salsa with Spiced Black Beans and Corn


The summer I lived in Georgia, the couple I stayed with kept the kitchen fully stocked with fresh, juicy peaches all summer long. These were not your run-of-the-mill grocery store peaches. Rather, I'm pretty sure she bought most of them from local growers and fruit stands. Jann even knew the names of the different varieties, when each variety would come into season, and the unique flavors of each variety. Many evenings that summer, Jann and I would stand side by side at the kitchen sink, peeling and slicing peaches, our hands dripping with juice while we told each other about our day.

Though I liked peaches before then, it was that summer that really solidified my love for peaches--especially juice-running-down-your-chin, just-picked-that day peaches. So when Google showed me recently that there's an annual peach festival in Weatherford, Texas (of all places), I convinced a couple of my peach-loving and/or festival-loving friends to take a trip to Weatherford for some peach love. Food highlights for me included the Caribbean jerk chicken sandwich for lunch, the homemade peach ice cream for dessert, and the bottle of lavender balsamic vinegar I brought home with me.


One of my goals for our trip to the festival was to get some peach salsa. I'd made it once before and really liked it, so I was interested in trying someone else's version. Unfortunately, though, by the time we got there and ate lunch (and ice cream) and got serious about browsing the manymany vendor booths, the jarred peach salsa was sold out everywhere we looked and asked. But no worries! Because I was already planning to buy a bunch of fresh peaches from the fresh produce stand (which we all did), and I still had that trusted peach salsa recipe from before, so I just made my own again tonight.

Rather than do something the same way twice, though, I took the peach salsa from before, and served it over the corn and black beans from these lettuce wraps. The lettuce wraps recipe also included a guacamole which sounded lovely, but I didn't feel like making three different components, so I just cubed an avocado, and that was simple and perfect. The black bean/corn part of the dish has so many warm flavors going on, the peach salsa pretty much tastes like summer, and the avocado added this creaminess that brought all the flavors into harmony.

If you wanted to bulk this up or make it stretch to more servings, you could easily add some cooked quinoa or millet. Originally I had planned to do that, but I decided to keep it simple tonight, and I didn't miss the grain at all.


Peach Salsa with Spiced Black Beans and Corn

Peach salsa adapted from A Couple Cooks and posted previously on my blog hereblack beans and corn adapted from A Couple Cooks.

Yield: About 3 servings. I know that's weird, and I'm sorry. I was planning to do 2 servings but got too excited about peaches once I started cutting into them, so I ended up with 2-3 generous servings of peach salsa and 3-4 servings of the black beans and corn.

Peach Salsa Ingredients
3 ripe peaches, peeled, pitted, and chopped
1/2 medium red onion (or 1/4 large red onion), finely chopped
Just under 1/2 jalapeno, seeded and minced (more or less to taste)
Juice of 1/2 lime
Small handful fresh cilantro, chopped
Kosher salt, to taste

Everything Else
1/4 to 1/2 large red onion
1/2 green bell pepper, chopped
1 ear of corn, kernels removed
1 can black beans, drained and rinsed
2 Tbsp. olive oil
1 tsp. dried oregano
1 tsp. cumin
1 tsp. smoked paprika
1 tsp. kosher salt
Dried chipotle powder, to taste (or chopped, canned chipotle peppers in adobo sauce, to taste)
Black pepper, to taste
3/4 cup water
1 avocado, cut into cubes

Directions
For the salsa, combine all the salsa ingredients in a bowl. Toss to combine. Set aside.

Heat the olive oil in a large skillet over medium heat. Add the red onion, green pepper, and corn; saute until veggies are slightly browned, about 5 minutes, stirring only very occasionally. Add the black beans, oregano, cumin, smoked paprika, salt, pepper, chipotle, and water. Give it a good stir, and continue cooking for another 5 minutes or so, stirring occasionally, until the liquid has cooked down.

To serve, spoon some of the black bean and corn mixture into a bowl. Top with avocado and peach salsa, and give it a good stir. Then add some more peach salsa on top because it's hard to resist adding just a bit more.

Wednesday, July 8, 2015

Sparkling Cucumber Limeade


Confession: summery drinks are a bit of a guilty pleasure for me. In the fall and winter I go head-over-heels for winter quash, cozy casseroles and soups, and all things roasted. But when summer rolls around, it's all about the fresh herbs and refreshing drinks!

Yes, I know they're full of sugar and empty calories. But when it's 100 degrees and I want my air conditioning bill (some people call it an electric bill) to not be exorbitant, a tasty cold beverage becomes almost a necessity.

And what's more refreshing than lightly bubbly limeade infused with cucumber and fresh mint? Not much, my friends!


Sparkling Cucumber Limeade
Adapted from Rachael Ray, as seen on Taste and Tell
Yield: 4 servings

Ingredients
1 cup water
1 cup sugar
1/4 cup fresh mint leaves, torn
1 cup lime juice (I use bottled)
1 medium cucumber, sliced (peeled if the skin is bitter)
Additional mint leaves (optional)
2 cups sparkling water, chilled (see notes)

Directions
In a small saucepan, combine sugar and water. Bring to a simmer over medium heat, stirring, until the sugar is dissolved. Remove from heat and stir in the mint leaves. Let sit, for 10-30 minutes.

Remove and discard the mint leaves, which will probably now be dark brown and less appealing-looking. Combine the sugar water with the lime juice and cucumber. Add more fresh mint leaves, if desired. Refrigerate for at least an hour. (I actually like to let mine chill for about 30 minutes before adding the cucumbers--I'm afraid of cooking them slightly if the sugar water is too warm.)

Right before serving, add the sparkling water (see notes) and serve over ice.

Notes
Since I live by myself, I usually eat and drink by myself. Which poses a problem with fizzy beverages like this, because I can either 1) drink a reasonable amount in one sitting, but then the rest of it goes flat before I drink it, or 2) drink the entire pitcher, but be sick because that's ridiculous. So here's what I do:
  • Make the recipe, minus the sparkling water. Store this in the fridge for use as needed.
  • Buy the skinny cans of Perrier (250 mL each) and keep those in the fridge.
  • When I'm ready to partake, I use a pint-sized mason jar, add 3-4 ice cubes and almost a whole can of Perrier, and fill the rest with the limeade concentrate. That ratio is just about perfect for me, but you may find that you like more or less of the concentrate.
Also, for the record, I don't like sparkling water on its own (even the flavored stuff), so I'm usually skeptical about recipes that call for it. But it's great in this drink!

Wednesday, June 17, 2015

Summer Squash Refrigerator Pickles


‘Tis the season for gardens bursting with zucchini and yellow squash! Which means ‘tis also the season for those with gardens to become especially earnest in sharing squash with their friends and neighbors. Which means that, whether we’re growing them ourselves or receiving them from a friend, ‘tis the season to find many ways to prepare squash beyond zucchini bread and simple sautés.

So last week I tried my hand at pickling some squash! And I must say that I rather like the result. These are refrigerator pickles, also called quick pickles, which I think just means that 1) you don’t have to go through the extra step of sealing the jars to make them shelf stable and 2) therefore they go straight into the fridge rather than into the pantry. This was perfect for me since I wanted to go ahead and eat them, and canning still scares me.


I looked at lots of recipes for quick pickles, and learned that there are so many variations you can do. You definitely need salt, squash (or other veggies), and some sort of vinegar. Most of the recipes I looked at called for peppercorns. But from there, you can add various fresh herbs, ground spices, onions, other veggies like red bell pepper, or sweeteners to adjust the flavor to your liking. 

I tried a couple different variations—one more basic, and one more flavored—and made a quart jar of each. And I can’t quite decide which one I like better. The basic version (below) tastes very clean and un-fussy, while the slightly spicy variation (see notes) has a more complex flavor. As far as squash quantity, I had one mammoth zucchini plus two smallish yellow squash, which I sliced and split evenly between the two quart jars.


Summer Squash Refrigerator Pickles
Yield: 1 quart

Ingredients
4-5 sprigs fresh cilantro
1-1/2 cloves garlic, peeled and halved
1-1/2 tsp. whole peppercorns
1/2 tsp. ground coriander
3/4 lbs. yellow squash and/or zucchini, sliced into rounds
1/4 cup sliced yellow onion
1-1/4 cup white vinegar
1-1/4 cup water
1 tsp. kosher salt

Directions
To a clean, quart-sized mason jar, add the first seven ingredients (through onion). I put my garlic, peppercorns, and coriander at the bottom, and tried to sort of layer the onion and squash. In a small saucepan, bring vinegar, water, and salt to a boil. Pour over the contents of the jar, pressing down the vegetables so they’re submerged. Gently tap the jar on the counter to release air bubbles. 

Allow the jar to cool on the counter, then put a lid on the jar and let it chill in the fridge at least overnight. After mine was cooled and was lidded, I gave it a good swish (that’s gentler than a full-blown shake) every so often to help the flavors permeate the liquid and, therefore, the veggies.

Notes
  • For the variation I’m calling Slightly Spicy Summer Squash Pickles, add 1/4 tsp. red pepper flakes to the jar, and use cider vinegar instead of basic white. 
  • I’ve only just made these so can’t testify personally, but most of the refrigerator pickle recipes I’ve seen say that these will keep for about a month in your fridge.

Saturday, June 13, 2015

The Most West Texas Meal Ever

Today I'm thrilled to introduce a guest post from Josh, my second older brother (you get to figure out what that means). There are two recipes below, with results at the end of the post. You may remember Josh from my trip to visit him in New Zealand, from his blog To Insanity and Beyond, or from actually knowing him in real life. Or you may have absolutely no idea who this redheaded dude is. Either way, you're in for a treat today, because not only is he good at playing army men and Teenage Mutant Ninja Turtles with you when you're little, but he's also an excellent writer.

--

At various points in my life, I’ve held the following jobs:
  • Working at a chicken factory.
  • Hauling furniture.
  • Doing the grunt work that no one else wanted on a construction site.
  • Scraping up bird poop.
  • Running a hostel…which required scraping up human poop.
  • Taking inventory in various warehouses.
  • Unpaid youth minister at a church that never realized I possessed actual skills.
  • Painting houses…in the Texas summer.
  • Cashier at a fish and chips shop in an Aboriginal war zone.
Among the very worst of my occupational episodes, though, was that phase I spent working part time as a landscaper.  I hate mowing lawns.  It’s hot, it’s boring, it’s loud, and next week you have to do the exact same thing again because the grass is too stupid to stay down.  Sometimes we’d get a specialty assignment, like laying sod or trimming a tree.  This would take several hours, and of course we still had to get all the regular mowing accounts in too.  I hated that job so much.  I hit rock bottom the day I was assigned to trim a yucca plant.  If you’ve never had the pleasure, you’ll probably die happy, but let me explain what you’ve missed out on.  Imagine a six foot bouquet of spears, controlled by a subtle but intelligent mind that is sadistic and predatory.  Yucca plants bathe in the blood of living things, draining the souls of their victims along with their life force.  They don’t do this for their own sustenance, like a Venus fly trap.  No, they do it because they’re jerks.  Yucca plants are hostile, and they refuse to negotiate.

So when Karissa suggested we include yucca in our gourmet feast, I couldn’t have been happier.  (That is, once a quick Google search confirmed people actually eat yucca and she wasn’t just trolling me.)   This would be my revenge.  This would right an ancient wrong, rebalancing the scales of justice in favor of the downtrodden.  Yucca did me dirty; now, yucca would be my lunch.

The yucca would just be a side dish, though.  Initially, Karissa wanted to make prickly pear barbecue sauce, which sounded rad to me.  Of course, what good is barbecue sauce without meat to go under it?  Most people, when faced with this scenario, would content themselves with a pork roast.  Not us.  Karissa said, “I have some wild boar in the freezer.”  Yes.  Yes.

So our feast would be wild boar with prickly pear barbecue sauce and a side of yucca.  This is also known as the most west Texas meal ever.


Wild Boar with Prickly Pear Tequila Barbecue Sauce

Wild Boar Directions:
  • Eat a pineapple for breakfast.
  • Vertically slice up 1 red onion and spread it around the bottom of the crockpot.
  • If you have a kitchen slave or a butler, have them gently and methodically massage salt and pepper deep into the boar meat.  Lacking either, simply salt and pepper the surface of the meat, then place it in a skillet on high heat to get a good sear on all sides. 
  • Place the wild boar meat inside the crockpot on top of the onion layer.  Then add 1 whole red onion (peeled) to let it bask in the glorious essence of the wild boar.  If you are cooking the boar’s head, place the onion inside the boar’s mouth.
  • Add 1 cup of hot water.
  • Lay the entire pineapple core from breakfast lengthwise inside the crockpot against the boar meat.  Scatter additional pineapple fragments around the meat surface.  Cook on high for four hours.
Pro tips:
  • If pressed for time, you may cut the meat into two or three chunks so as to expedite the cooking process.  As an added bonus, this creates ideal cavities for the pineapple core and fragments.
  • Don’t be a n00b – coat the inside of the crockpot with canola oil so your butler won’t have to spend an hour cleaning it.  He needs to be answering the door.
Sauce Ingredients:
3 medium red onions (two of these are already cooking in the crock pot with the boar)
1 Tbsp. canola oil
1-1/2 cups prickly pear juice
3 Tbsp. unsalted butter
Scant 1/2 tsp. ground coriander (or 1/2 tsp. coriander seeds, ground)
Scant 1-1/2 tsp. ground cumin (or 1-1/2 tsp. cumin seeds, ground)
1 tsp. crushed red pepper flakes
2 jalapeno chilies, minced, ribs and seeds removed
3 garlic cloves, minced
1 tsp. lime zest*
1/2 cup white Worcestershire sauce**
1/2 cup tequila
1/4 cup apple cider vinegar
2 Tbsp. lime juice***
2 tsp. kosher salt

*For the n00bs, that’s when you shave off the green stuff from the lime peel but not the white stuff.  It’s a pretty thin layer, so don’t go nuts.
**We didn’t have white Worcestershire sauce, because West Texas, so we substituted with the following: 1 Tbsp. Worcestershire sauce, 1/4 cup + 1 Tbsp. white wine, 2 Tbsp. apple cider vinegar, and 1/4 tsp. sugar.
***I juiced the lime I used for the zest and it came out to exactly 2 Tbsp.  Boo yah!

Sauce Directions:
  • Remove onions from crockpot, both whole and sliced, discarding any charred bits. Place in blender with prickly pear juice and blend at high speed until completely smooth.
  • Mince remaining red onion.  Pro tip: Light a candle and keep it near the chopping station.  It’s the sulfur in the onion that irritates your eyes, and the open flame burns the sulfur away.  Your butler will thank you; your kitchen slave won’t, as they have not been granted permission to speak.
  • Heat 1 Tbsp. of butter in a saucepan or large skillet over medium heat.  Sauté minced onions until lightly caramelized (about 5 minutes).  Add coriander, cumin, pepper flakes, jalapeno, garlic, and lime zest.  Cook until fragrant.  Pro tip: The recipe recommends “cooking until fragrant” for two minutes, but we say a minute should do.  Garlic burns easily, and you don’t want to burn your garlic.  That would be sad.
  • Add Worcestershire, tequila, cider vinegar, and lime juice.  Cook over medium-high heat until volume is reduced by half.
  • Stir in the onion/prickly pear blend and salt, bringing to a simmer.
  • Remove from heat and swirl in the remaining butter.
These are yucca roots

Yuca con Mojo (Yucca with Garlic Sauce)

Ingredients:
4 yucca roots (we did 2 yuccas and ended up with twice as much sauce as we needed.)
1 tsp. salt
Juice from 1 lime
6 garlic cloves, mashed
1 tsp. salt, doesn’t have to be kosher.  Anarchy!
1/3 cup lemon juice
1/2 cup olive oil
1 chopped red onion

Directions:
  • Peel and cube yucca.  Cubes must be the exact size of gaming dice, complete with rounded edges and dots etched into each face.  Otherwise you fail at dinner.  And life.  All your loved ones will abandon you.  You will be Gollum.
  • Be sure to remove woody fibers that may be running down the middle of the yucca.
  • Place yucca in saucepan and cover in water.  Add salt and lime juice, then bring to a boil.
  • Reduce heat, cover, and simmer until tender (approximately 30 minutes).
  • Drain and keep warm.
  • Fire your butler; he’s doing a terrible job.
  • Mash garlic.  Add garlic, lemon juice, and onions, and oil in the same pan you used for boiling.  Because you no longer have a butler to wash extraneous pans.  
  • Heat until bubbling, then add the yucca to the pan, sautéing over medium heat until barely brown – but not CRISP!  (Note: the recipe was very adamant about this.  The all-caps crisp came straight from off the recipe page.  If the yucca gets crispy, I can only assume the apocalypse is upon us.)  

Results

Expectations were astronomical.  Could the reality of this meal live up to the hype?  In a word, yes.

For those of you who grew up in the jungle, yucca reminded us both of taro, a tuber that serves as a staple in the Papua New Guinean diet.  (If you didn’t grow up in the jungle, I’m not going to clarify that; you just get to feel left out.  Look, just cook up some yucca and try it for yourself.)  The sauce was a unique blend of flavors unlike anything I’ve tasted before – and it packed a late kick.  We both agreed that next time we might cut back on the pepper flakes and/or jalapeno to make it a bit less spicy.  It wasn’t too spicy to be enjoyable though; not by a long shot.  We’re just white.  And the wild boar was wild boar.  Enough said.

Most importantly, I established my dominance over the yucca.  I remain at the top of the food chain, with the yucca holding company with the likes of chicken and sushi.  Actually, sushi is higher than yucca.  Sushi eats yucca.  It’s science.

Here’s a picture of Karissa’s cat.  I think that’s how we do it on her blog.

LATER EDIT: Karissa fried up some leftover yucca a couple days later, which left it a little crispy on one or two sides.  She declared it better this way.  Pro tip: Never believe the recipe.

Recipe credit: This recipe served as the guide for the boar and sauce, and this one for the yuca/yucca.

Wednesday, June 3, 2015

Prickly Pear Lemonade (or Limeade)


There are few beverages that feel as summery as lemonade. So in honor of the weather warming up (thank you, Texas, for the gloriously cool May!) and because there’s still a whole lot of prickly pear juice in my freezer (oops, didn’t mean to hoard it so stingily) I bring you prickly pear lemonade.

If you aren’t into harvesting prickly pear fruit, just use some other fruit juice. Maybe some peach nectar or pureed/mashed blackberries?

And for the record, I use the bottled Real Lemon and Real Lime juices. Because really, who has time—and wrist strength—to juice that many lemons?


Prickly Pear Lemonade (or Limeade)
Yield: 1/2 gallon

Ingredients
3/4 to 1 cup sugar
1 cup prickly pear juice
3/4 cup lemon juice
1/4 cup lime juice
Water and ice

Directions
In a glass measuring cup, combine sugar with some water. Microwave for about a minute, so the water gets warm enough to dissolve the sugar. Then pour sugar water into a half-gallon pitcher or mason jar, along with the prickly pear juice, lemon juice, and lime juice. Fill the pitcher the rest of the way with ice and cold water.

To make limeade: Simply switch the lemon and lime juice measurements. I like the limeade slightly better with 3/4 cup sugar and the lemonade slightly better with 1 cup sugar.